How to pass the motorcycle "shaken" inspection in Tokyo by yourself
Like everything else in Japan, it's easier if you know how to speak Japanese properly, but don't worry, it's not as difficult as you might think
The motor-vehicle inspection (shaken or JCI inspection) is a compulsory inspection for all vehicles on the road in Japan that must be taken every 2 years. The shaken is mandatory only for motorcycles above 250cc. In Spain, this inspection is called ITV and it's also mandatory (for motorcycles starting at 125cc) every two years once the bike is older than 4 years. In the UK it's called MOT. Bikes older than 3 years must pass it every year. The advantage is that there are 2,800 motorbike MOT facilities in the UK.
Last month I had to go through the process of renewing the shaken for my Kawasaki W800 in Tokyo, so I thought it could be a good idea to share my experience. Hopefully, it can help reduce the anxiety of some gaijins who, like me, sometimes worry too much about dealing with Japanese administrative duties.
Check the expiration date
First of all, check the expiration date of your shaken on the JCI inspection certificate (syakensyo):
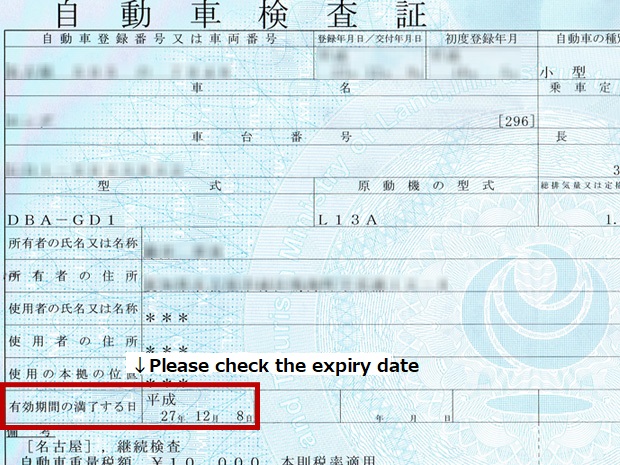
For official documents, instead of the western calendar (seireki), they use the traditional Japanese calendar, which is based on the reign period of the emperor.
These are the periods:
- 2019 - Present ~ Reiwa Era
- 1989 - 2019 ~ Heisei Era
- 1926 - 1989 ~ Showa Era
- 1912 - 1926 ~ Taisho Era
| Western Years | Japanese Years |
|---|---|
| 2024 | 令和6年 |
| 2023 | 令和5年 |
| 2022 | 令和4年(or 平成34年) |
| 2021 | 令和3年(or 平成33年) |
| 2020 | 令和2年(or 平成32年) |
| 2019 | 令和元年(or 平成31年) |
| 2018 | 平成30年 |
Get the papers ready
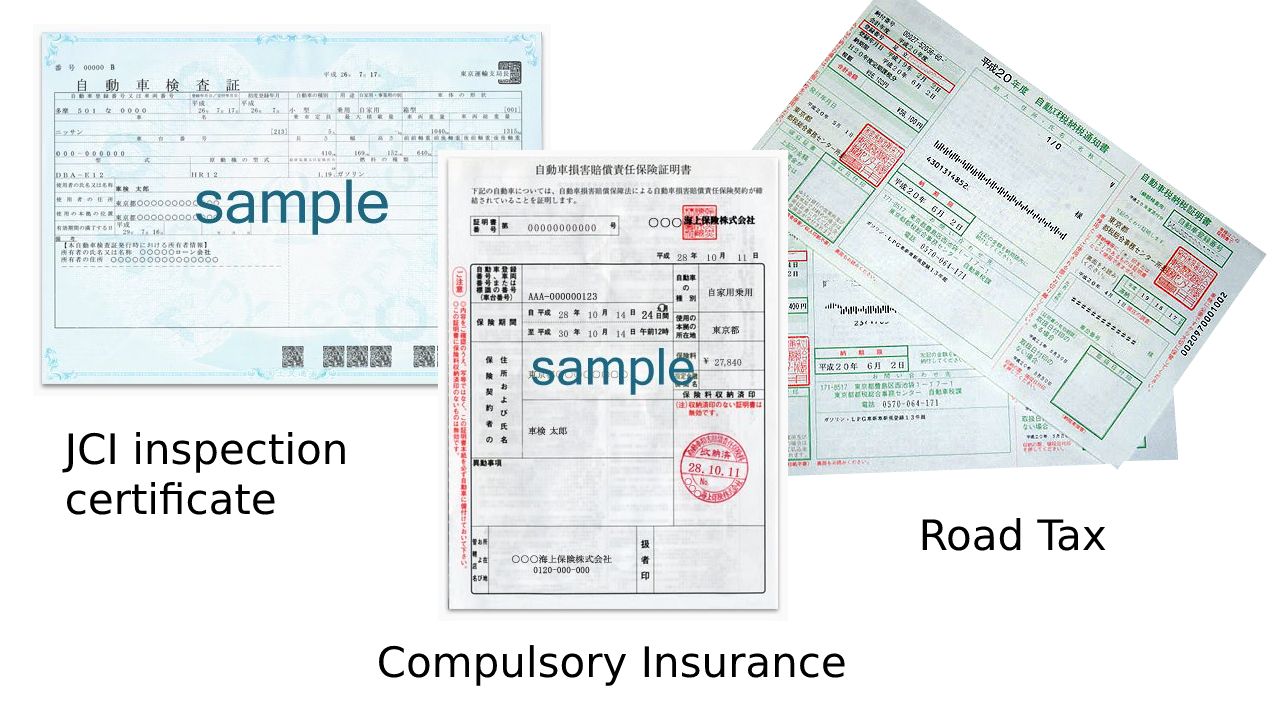
These are the documents you will need:
JCI inspection certificate (自動車検査証 / syakensyo): This is the blue document that we talked about in the previous section. I usually bring a copy with me when I'm riding the bike and keep the original at home. It contains information about your motorcycle and the registered owner
Road tax payment receipt (自動車税納税証明書): This is the tax to be paid by the owner of the vehicle every year. If you are the owner of the vehicle as of the 1st of April of the year, you will receive the document by mail and you can pay it in any combini
Certificate of compulsory vehicle liability insurance (自賠責保険証書 / jibaiseki): This is the insurance certificate that will also expire on a similar date as the shaken. It has to be renewed as well at the same time as the shaken
Inkan (personal seal): if you don't have one, then using your signature is fine
Request a date for the inspection
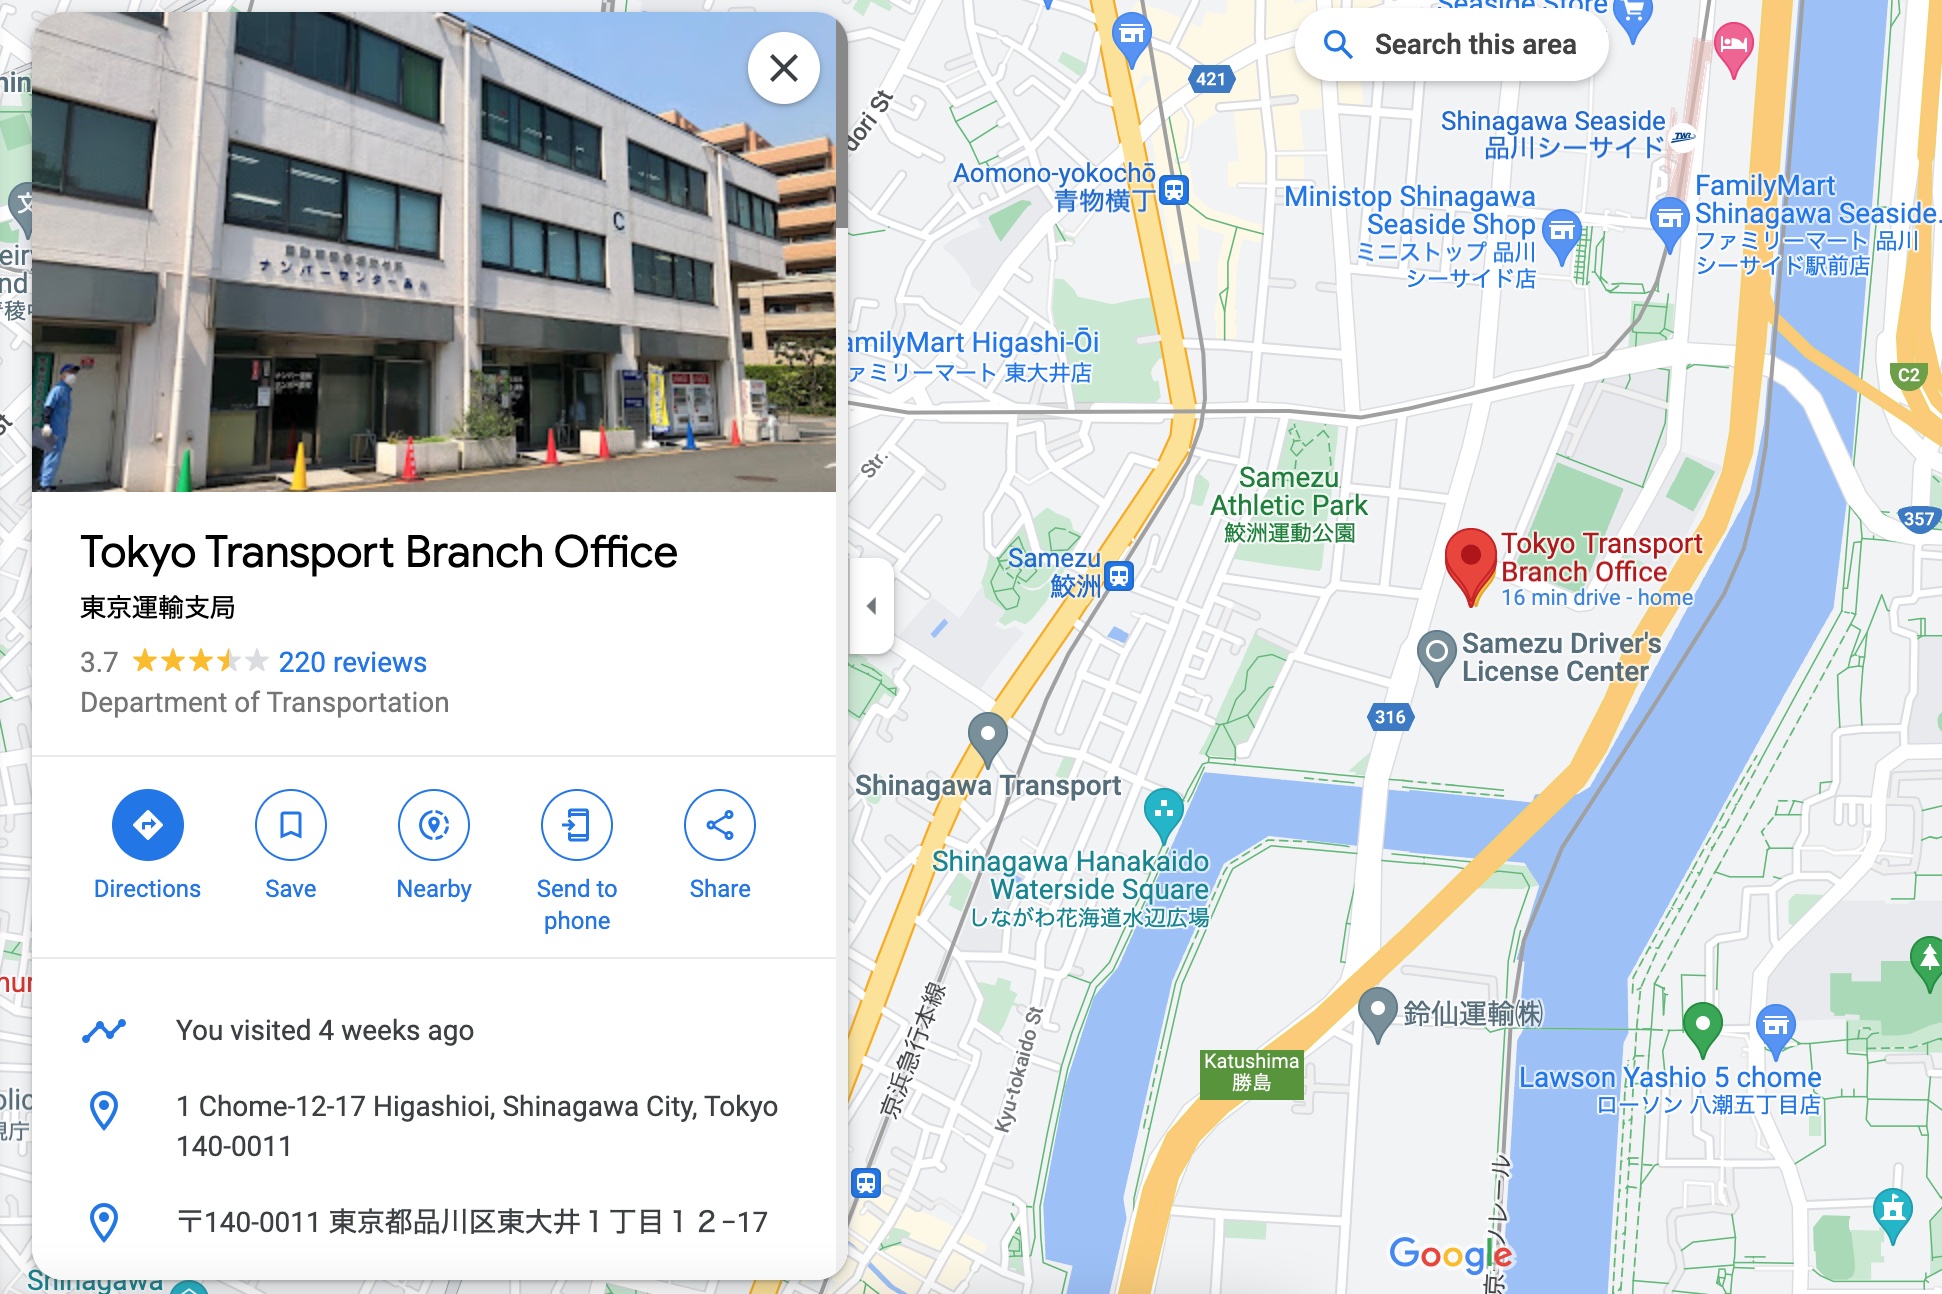
In my case, I had to request a date for the inspection center in Shinagawa. That is the closest to my place.
- Go to reserve.naltec.go.jp and click on account registration if you still don't have an account. You can use Google Translate
- Once your account is ready, log in and go through the process. In my case, I selected Continuous inspection, motorcycle, Tokyo and Tokyo Transport Bureau
- Select a date and time and you will receive an email with the reservation number
Weekdays and mornings are probably going to be less crowded. That's how it was in my case.
If for whatever reason you decide not to go, remember to cancel the appointment and request a new one. You can cancel it even just one hour before, no worries.
The inspection center is located in Shinagawa: https://goo.gl/maps/unp3ybW6kfAWJb2f6
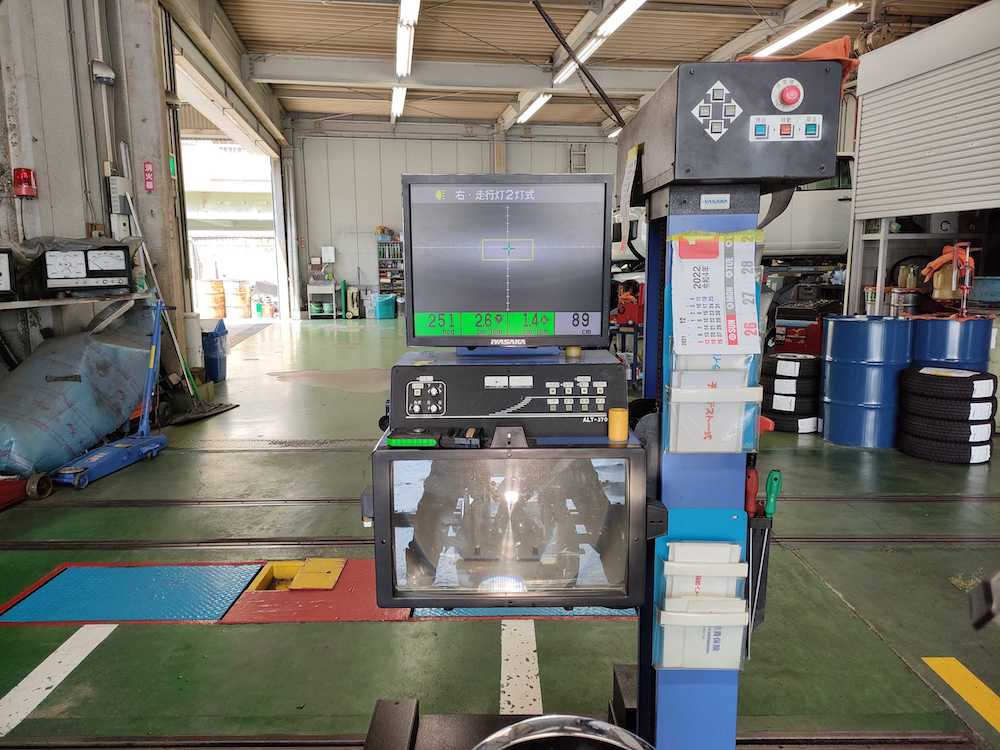
The headlight alignment
The most critical part of the whole process is the headlight alignment. For some reason, they are very picky with this particular requirement in Japan. Thankfully, there is a garage right in front of the inspection center that specializes in precisely this task. Here's the location: https://goo.gl/maps/U9nGAqzGwQNxB3qz9
One thing that I learned the hard way... Don't go to test your headlight with a LED bulb. It's probably not going to be strong enough. I had to buy a halogen one in Ricoland Tokyo Bay. This is the one I bought:

Also, during the alignment process, make sure that the screen shows a perfect alignment. Otherwise, you'll have to come back to the garage because you will not pass the shaken test. It doesn't matter how you achieve that perfect alignment. The guy in the garage put a piece of cardboard and some tape on the sides to get it right. During the inspection, they don't care about the cardboard or the tape, so don't worry about it. I know. This also puzzles me, but that's just how it goes.
The cost of the headlight alignment is about ¥2.000 IIRC and the process takes just 5 minutes. Sometimes there is a small queue outside the garage, so it can take a bit longer. But it shouldn't take longer than 30 minutes.
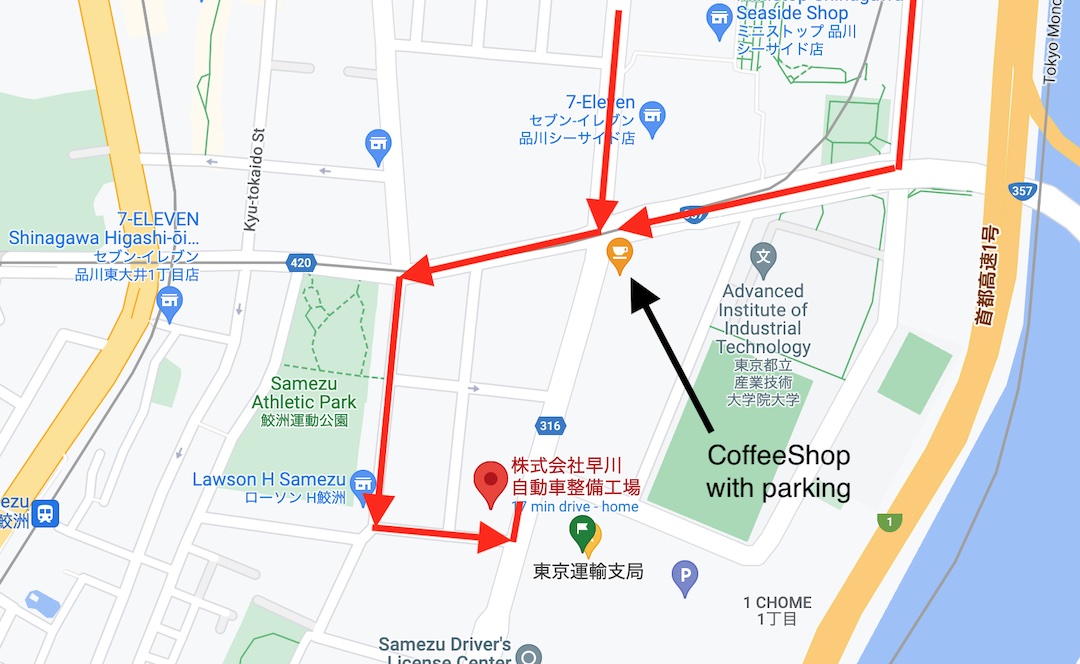
Another tip regarding the garage access: If you are coming from the north, it's better to follow the route in the screenshot below, so you don't have to cut through the traffic coming from the opposite direction:
Things to check before the inspection
Make sure that all the lights, breaks and the horn work properly
In the inspection center, they might ask you if you have a maintenance book. I didn't have one, so it doesn't seem to be mandatory. In any case, it's a good idea to bring an invoice or some paper that shows when you last changed the oil, filter, etc. But, as I said, I didn't have to show anything like this
If you have changed/modified any part of your bike, bring the papers that prove these parts are homologated and compatible with your bike. For example, my bike doesn't have the original exhaust pipes, so I have some papers that show they are similar to the original and they can pass the inspection
On the day of the inspection
If you haven't chosen a very early timeslot, you could try to do the headlight alignment and the inspection on the same day. Just cross the street (with your bike) to the inspection center
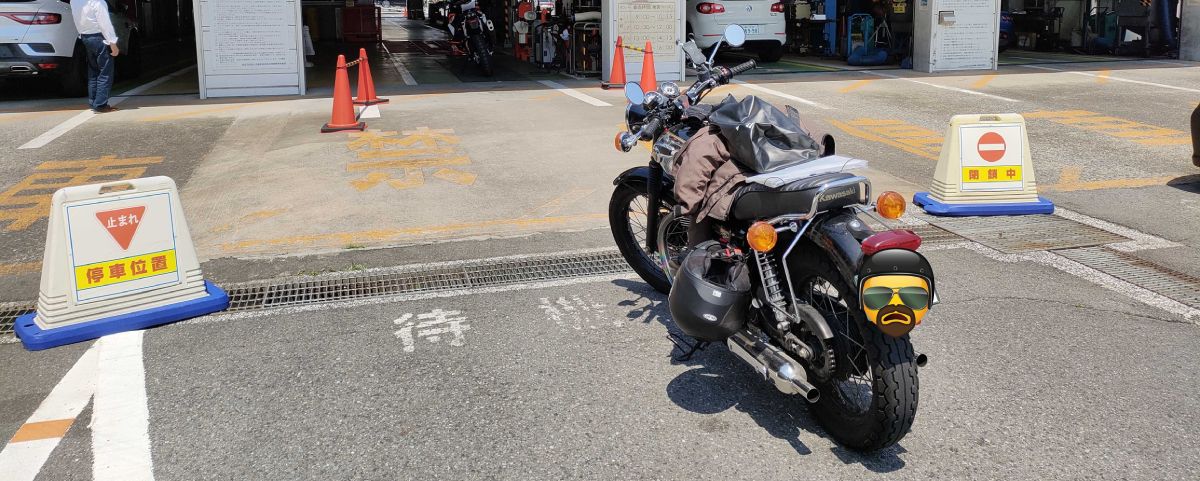
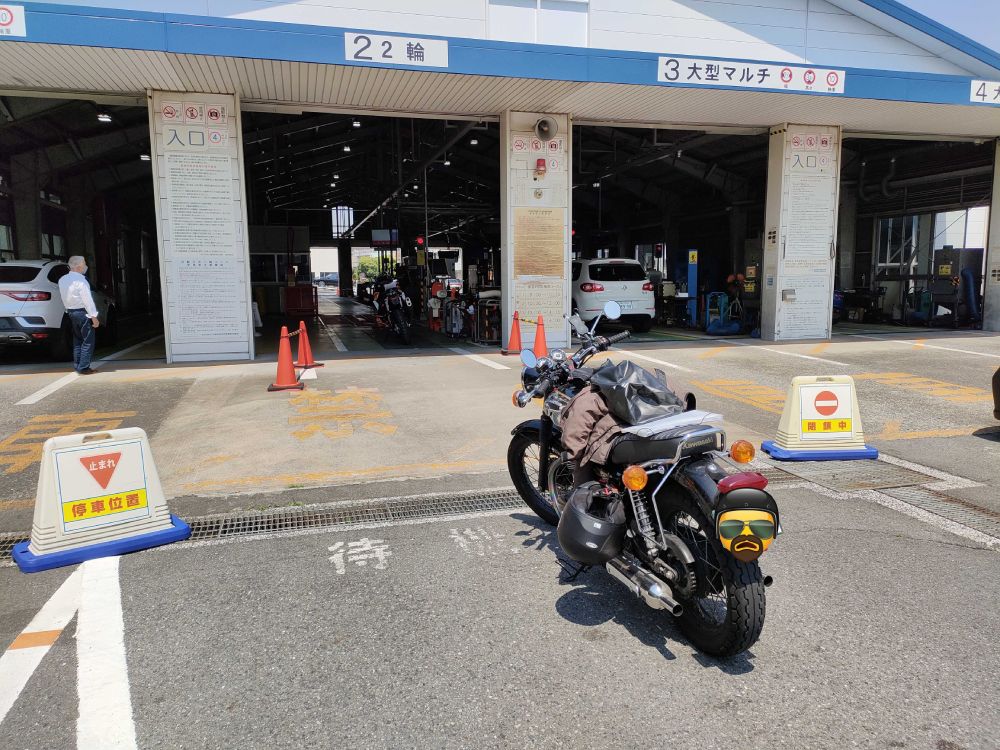
Once I arrived at the inspection center, this is where I parked my motorcycle (besides the stairs) and no one complained about it. There were no cones as well:

Take the stairs and go to the 2nd floor. As soon as you enter, mention that you have a reservation for the shaken and they will give you some papers to complete
Once you give them the papers, they will send you to another building where you will have to pay the weight tax and renew the mandatory insurance (jibaiseki). They will tell you the window number where you have to go next so it's pretty easy
Once you complete all the paperwork and paid everything, they will tell you to bring your bike to the building where they will perform the inspection. Notice that the lane is narrower than the others because it's specific for motorcycles
When you reach the gate, just stay in line until someone comes to check your papers. They will ask you to switch the lights on and off, rev the bike until a certain rpm, etc
Next, you will have to move your bike inside the building to check the brakes, headlight alignment, exhaust noise and fumes. They will ask you if you need English assistance. If you say yes, then you will be able to read the instructions on a screen. Pretty useful!
Once the tests are completed they will let you know if you have passed or not. If everything went well, you will get your papers updated and will have to come back to the first building (2nd floor) where they will give you a new sticker to put on your plate and that will be the end of the story. If you got something wrong (like me) then you will have to fix it and come back to pass the failing part of the test again. In my case, it was the headlight alignment. It wasn't perfect, so I had to cross the street and do it again. At least they didn't charge me extra. Going to the garage and coming back was also pretty fast, perhaps just 15 minutes, so don't worry if you don't pass the alignment the first time
Conclusions
Overall, even if I worried for many days prior to the inspection (mostly because of the language barrier), it turned out to be more like an interesting learning exercise rather than a bureaucratic pain in the ass. It was annoying having to change the LED bulb, but shoganai. So if someone asks me if I'd recommend doing the shaken by yourself, my answer would be yes. You will save substantial money and learn something along the way. I don't recall exactly how much I spent, but it was something around ¥17.000, including the halogen bulb and the headlight alignment check. Considering that the whole process takes around 1.5h (not including the trip to the inspection center), I think it is worth it.
I would also like to show some appreciation for my biker-friend Greg, who was patient enough to answer all my questions and share his shaken experience with me. Thank you!
Finally, if during the process you feel that you need a break to think (like I needed), there's a Komeda coffee shop very near (it's on the map posted above) and it has parking for motorcycles.
What are your thoughts or how was your shaken experience? Did I miss anything or said something wrong? Please let me know in the comments. Thank you!